Guide
How to Use a Capo: Step-by-Step Guide for Every Guitar
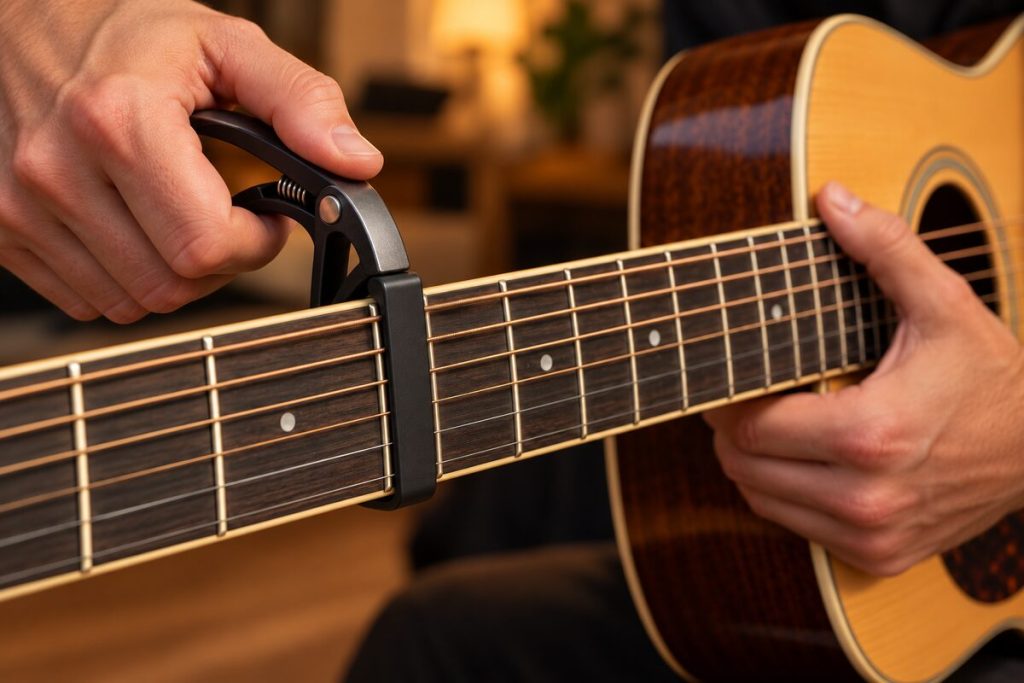
To use a capo, tune your guitar first, clamp the capo across all six strings just behind the fret you want, check that every string rings clean, and play the same chord shapes you already know. The pitch moves up one half step for every fret you climb. Here are the steps in short:
- Tune the guitar with no capo on.
- Choose the fret, then place the capo right behind it, parallel to the fret wire.
- Squeeze or tighten just enough that all six strings ring without buzz.
- Pluck each string one at a time and fix any dead or buzzing note by nudging the capo.
- Retune lightly if needed, then play your usual open chord shapes.
That is the whole method. The rest of this guide covers the details that separate a capo that works from one that fights you: where exactly it sits, how each capo type grips, how to use it to change keys, and the mistakes that cause most of the trouble.
How to put a capo on a guitar
A capo works like a barre chord that never gets tired. It presses all the strings against one fret and shortens the vibrating length of every string at once. Because the strings are now shorter, every open string sounds higher, and your open chord shapes move up the neck without you changing a single finger.
- Tune first. Tune with the capo off. Clamping a capo can push the strings slightly sharp, so check again after it is on.
- Pick the fret. A capo on the 1st fret raises everything one half step, on the 2nd fret two half steps (one whole step), and so on.
- Place it just behind the fret. Put the capo close to the fret wire on the side facing the headstock, not in the middle of the space between two frets. Sitting right against the wire gives the cleanest note and the least buzz. Sitting too far back makes the strings go sharp and can mute them.
- Keep it square. The pad should lie flat across the strings, parallel to the fret. A tilted capo pulls some strings sharper than others.
- Apply only enough pressure. Use the lightest grip that gives six clean notes.
- Test every string. Pick the open strings one by one. If one buzzes, move the capo a hair closer to the fret or adjust the pressure.
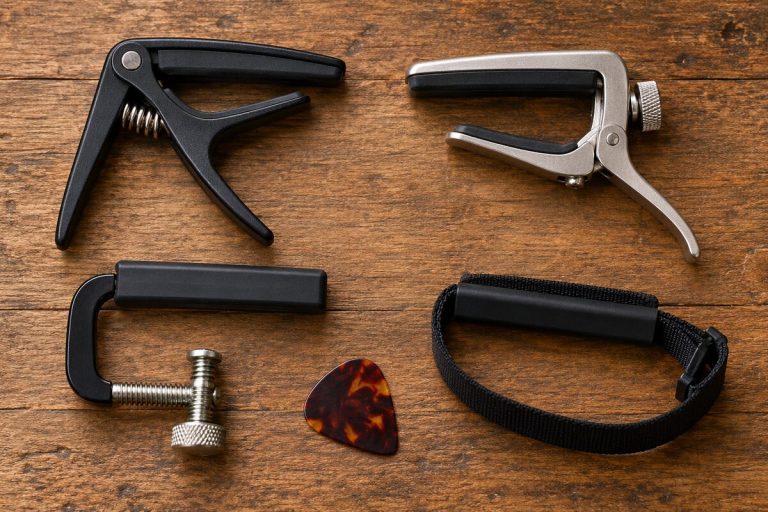
Trigger or spring capo
A trigger capo is a spring clamp you squeeze open with one hand. You can put it on and take it off mid-song, which is why many players keep one on the gig bag. Squeeze the trigger, slide the jaws over the neck, and release it just behind the fret. The spring sets the pressure for you, so there is nothing to tune by feel. The trade-off is that the pressure is fixed, so it suits necks it was designed for. Our Trigger Capo Pro is the one to look at if you want one-handed changes.
-

Aluminum Trigger Capo with Silicone Pads, 7 Colors
Trigger Capos $17.99 100+ sold worldwideChoose a color This product has multiple variants. The options may be chosen on the product page

Screw or adjustable capo (Shubb-style)
A screw or lever style capo, the family that includes the well known Shubb, lets you set the pressure yourself. You wrap the capo around the neck, then tighten the screw or close the lever until the strings ring clean. Because you control the pressure, you can use the lightest setting that works, which helps keep the strings in tune. The trade-off is speed: moving it takes a few seconds, so it fits songs where you set it once and leave it. If you use a Shubb-style capo, place the pad behind the fret, close the lever, and then check each string before you play.
Partial capo
A partial capo covers only some of the strings and leaves the rest open. That gives you open-tuning style sounds without retuning the guitar. Put it behind the fret on the strings you want raised, check that the strings it should miss ring open, and then play. It is more of a color tool than an everyday one, so learn the standard capo first and add a partial later.
How to use a capo to change keys
The main reason to own a capo is to change a song’s key without learning new chord shapes. If a song sits too low or too high for your voice, you move it up with a capo and keep the easy open chords.
Here is a worked example. Say a song is written with the chords G, C, D and Em, and it feels too low to sing. Put the capo on the 2nd fret and play those same shapes. Every chord is now two frets, a whole step, higher:
- G shape sounds as A
- C shape sounds as D
- D shape sounds as E
- Em shape sounds as F#m
You are fingering G, C, D and Em, but the audience hears A, D, E and F#m. Same fingers, new key. If the voice still wants it higher, move the capo to the 3rd fret and the same shapes now sound as Bb, Eb, F and Gm.
The reverse also works. If a song is in a hard key such as F# or Bb, find a capo position that lets you play it with easy open shapes instead. For a quick lookup of every shape at every fret, use our capo chart. If you want the idea behind all of this, what a capo does explains it from the start.
Which fret does the capo go on?
It goes on whichever fret puts the song in the key you want, and there is no single right answer. Work it out from two facts: the key the song is written in, and the key you want to hear. Count the half steps between them. That number is your fret. The table below shows what five common open shapes become at the first five frets.
| Capo fret | G shape | C shape | D shape | A shape | E shape |
|---|---|---|---|---|---|
| 1 | Ab | Db | Eb | Bb | F |
| 2 | A | D | E | B | F# |
| 3 | Bb | Eb | F | C | G |
| 4 | B | E | F# | C# | G# |
| 5 | C | F | G | D | A |
Read it by finding the shape you play in the top row and the fret in the left column. A G shape with the capo on the 5th fret sounds as C, for example. The full capo chart extends this to more shapes and frets. Most players stay within the first five or six frets, because past that the neck gets narrow and the guitar starts to sound thin and tight.
Common mistakes when using a capo
Strings out of tune
The most common problem is a capo that pulls the strings sharp. Too much pressure bends the strings down into the fret and raises the pitch. Loosen the grip until the strings only just ring clean, then retune with the capo on. If one string stays off after that, check the capo is square and not twisted.
A crooked or badly placed capo
A capo that sits at an angle makes some strings sharper than others, and a capo set too far back from the fret wire causes buzz and dead notes. Look at the capo from the side: it should lie flat, parallel to the fret, snug against the wire.
Squeezing too hard
More pressure does not fix a buzz. It usually makes the pitch worse and can strain the neck of a thin guitar. Fix buzz by moving the capo closer to the fret first, and only then add pressure in small steps.
Leaving it on
Take the capo off when you finish playing. Leaving it clamped for long periods keeps the strings under extra stress and can wear the pad. Store it off the neck.
Acoustic vs electric vs classical guitar
The technique is the same on every guitar, but the neck is not, and the capo has to match it.
- Acoustic. The standard case. Most capos are designed around steel-string acoustic necks, and the strings tolerate firm pressure well. See our acoustic guitar capos.
- Electric. Electric necks often have a more curved fingerboard than acoustics, so a capo with a flat pad can leave the outer strings loose. Choose a capo made to fit curved boards, and keep the pressure light, because electric strings are thin and bend sharp easily.
- Classical. Classical guitars have a wider, flatter neck and nylon strings, so they need a capo that is long enough and gentle enough for that shape. A capo built for steel strings can be too tight or too short. See our classical guitar capos.
If you are unsure which category you need, start with the guitar you own and work from there. The right type is the one whose size and grip match your neck, and every capo is a trade-off between speed and control.
Frequently asked questions
Tune your guitar, clamp the capo across all six strings just behind the fret you want, and check every string rings clean. Then play chord shapes you already know. Start on the 2nd or 3rd fret, since the change in pitch is easy to hear and the shapes stay comfortable. Use as little pressure as you can, and take the capo off when you finish.
A capo on the 3rd fret raises every open shape by three half steps. A G shape sounds as Bb, a C shape as Eb, a D shape as F, an A shape as C, and an E shape as G. The capo chart lists the rest.
The fret that puts the song in the key you want. Count the half steps from the key the song is written in to the key you want to hear, and that number is the fret. If a song sounds too low, move the capo up one fret at a time until it fits your voice.
The steps are the same as on an acoustic: tune, place it just behind the fret, and test each string. Electric fingerboards are often more curved, so use a capo that fits a curved board, keep the pressure light, and retune once it is on, because thin strings go sharp easily.